Chapter 1: Getting Started
Now that you have a significant amount of background information under your belt, it’s time to get your hands dirty with some actual code.
In this chapter, you will learn how to:
- Create an OpenGL context with FreeGLUT
- Initialize GLEW
- Create the boilerplate code used throughout the book
Check the requirements before continuing
This chapter is 100% compatible with OpenGL 3.x level hardware by changing only a few lines of code.
First Steps
Before we get started, make sure that you have the libraries discussed in the preface ready for use in your compiler. The examples in this chapter (or in this entire book for that matter) will not work without them.
Moreover, if you are using Windows, set your program to compile as a console/command line program since we will write to the console for debugging and informational purposes, even in this first chapter.
An OpenGL context allows us to pass commands to the underlying hardware, so without one your OpenGL program is quite useless. This section will set up the first bit of code that you will need to set up a functioning window; don’t worry if you don’t understand what the code does at this point, we will discuss the code in detail after we have our first program up and running.
Since we are starting from scratch, create a new file called chapter.1.c, open
it in a text editor or your development environment and insert the following
lines:
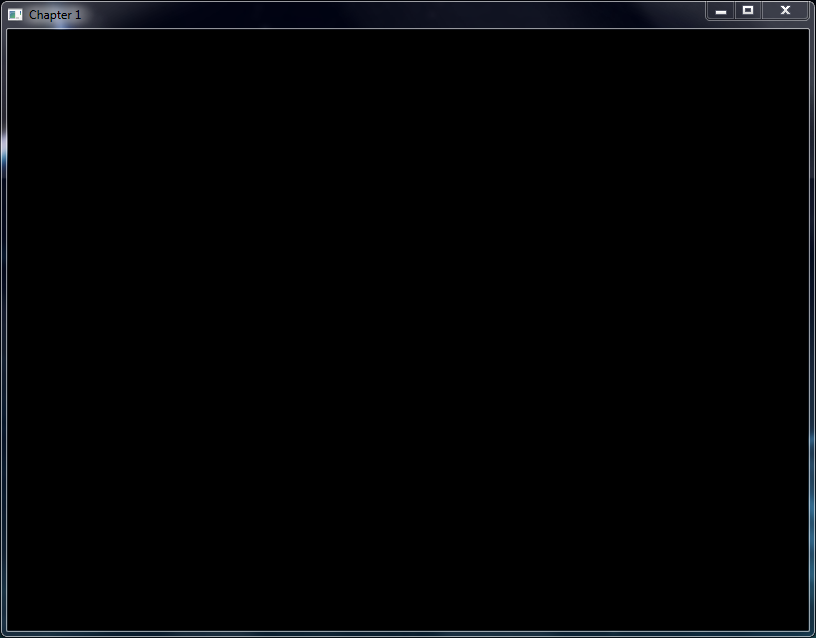
Now that you have defined the first program, you may safely compile and run the source code. What you see should be similar to the screenshot below:
Step-By-Step
Even if the end result of the code above is an unspectacular blank window that doesn't seem to do much, there is much going on behind the scenes. Let's step through some of the code that we've just added. We'll walk through the code from the top of the code file to the bottom, leaving and returning to functions where necessary.
The WINDOW_TITLE_PREFIX pre-processor definition simply serves as a
placeholder for our window title. The reason it's called prefix is because
we'll be appending some dynamic text to it a little later on in this chapter.
Next up are some global variable definitions CurrentWidth, CurrentHeight of
type integer, which store the current dimensions of the window. We also define
the global variable WindowHandle, used to store the handle to the window
created by FreeGLUT.
Initializing
After declaring the function prototypes and defining the main application
entry function, the next function of interest is the InitWindow function,
called by the Initialize function.
InitWindow calls several FreeGLUT functions to create a window, starting off
with glutInit, which initializes the FreeGLUT library. This function does not
return anything, but simply sets up FreeGLUT for use in your application. In
any program, this should be the first FreeGLUT function you should call.
As you may have noticed, glutInit takes two arguments, which are the command
line arguments from the main function. FreeGLUT takes several parameters, none
of which we shall use in this book, but for demonstrative purposes, we'll
simply pass the command line parameters to glutInit. If you don’t wish the
user to have any type of control of your program, you should pass empty values
to this function.
Context Types and Window Options
The next three function calls go together as they declare to FreeGLUT what type of OpenGL context we'd like to use for our program. The functions in question are:
glutInitContextVersionglutInitContextFlagsglutInitContextProfile
The parameters should be easily decipherable if you’ve read the section on deprecation in the preface; we're asking FreeGLUT to return a forward-compatible OpenGL 4.0 core-profile context.
The next function, glutSetOption, is called with the
GLUT_ACTION_ON_WINDOW_CLOSE option to make sure that the glutMainLoop
function in main returns to the program and doesn't exit the program when
it's done. The original GLUT library did not return to the program and after
GLUT was done rendering it would end your program. This meant that if you had
allocated any memory, there was no way to avoid memory leaks without some nasty
hacking into the GLUT library. FreeGLUT effectively ends this behaviour by
setting the GLUT_ACTION_ON_WINDOW_CLOSE option to
GLUT_ACTION_GLUTMAINLOOP_RETURNS.
glutInitWindowSize specifies the initial size of the rendering window, in our
case the values stored in the CurrentHeight and CurrentWidth variables, 800
and 600 respectively.
Display Modes
glutInitDisplayMode is a function that is a bit more involved since it
defines what type of OpenGL context we would like and how the device should
render our scene. In this sample, three distinct options are passed to the
function, namely:
GLUT_DEPTHGLUT_DOUBLEGLUT_RGBA
GLUT_DEPTH enables the usage of the depth buffer, an important mechanism
in 3D computer graphics. The depth buffer (also called Z-buffer) contains the
floating point Z-depth information of each pixel rendered to the screen. This
mechanism is important in the rendering of new objects for making sure that
they don't overlap any objects that are closer to the screen (thus also for
determining if the new pixel should overwrite the existing pixel). We'll
explore the depth buffer much more in chapter three where we'll start drawing
three-dimensional objects.
GLUT_DOUBLE is a flag that enables the usage of double-buffering, which
is a feature that reduces image flickering. With double buffering, all of the
draw commands are executed on an off-screen buffer, which is sent to the screen
when all of the drawing for a frame has been completed so that no incomplete
images are displayed.
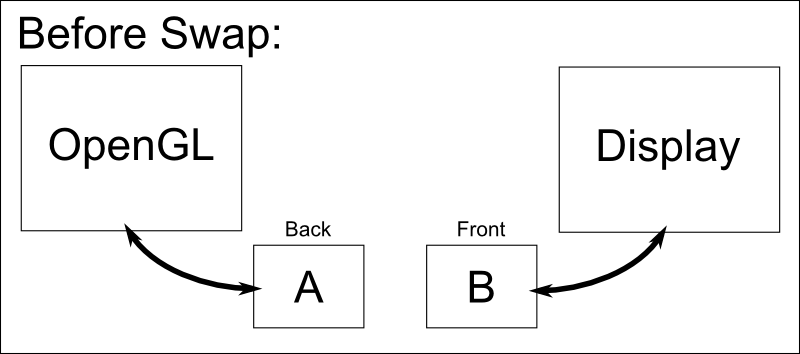
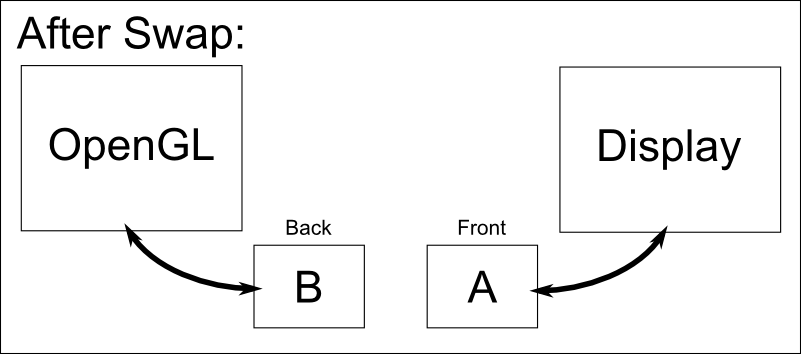
The buffer that’s currently displayed is referred to as the front buffer, and the buffer that we're drawing to is called the (you guessed it) back buffer. When all of the draw commands have been completed, these buffers are swapped so that the back buffer becomes the front buffer and vice versa.
GLUT_RGBA is a flag that defines the way colours are composited by using
individual Red, Green, Blue, and Alpha values. glutInitDisplayMode can take
several other options, which we'll explore throughout the book.
Window Creation
After the display options have been set, we're finally ready to create our
window, and thereby our rendering context. A call to glutCreateWindow will
create our context and will return a handle to our newly created window. As you
may have noticed, the sole parameter to this function is WINDOW_TITLE_PREFIX,
which will set the initial title for the window, in our case the string
"Chapter 1." We immediately check the return value when the function returns
and make sure that if the value is less than one, the program displays an error
message and exits with the proper return value. A FreeGLUT window is not valid
if the window-handle's value is less than the number 1, at which point the
program should fail or retry to create the window.
Function Call-Backs
If the program got past this point, we have a valid context and we’re ready for
drawing. But before we do that, we need to tell FreeGLUT the functions used to
handle window resizing and rendering the scene, which we'll set with
glutReshapeFunction and glutDisplayFunction, respectively.
The reshape function is called each time the window is resized, and the display function is called each time the scene is to be drawn to the screen. The call back functions for this are defined below in detail in the Resizing and Rendering sections.
Debug Output
InitWindow is finished at this point and returns to the Initialize function.
Since we have an OpenGL context at this point, it's safe to call OpenGL
functions, and the first one we call is glGetString with GL_VERSION as its
parameter in order to retrieve the version of the OpenGL context created in the
InitWindow function. This string is passed to the command line with the
standard C function fprintf, which should display similar to the screen below.
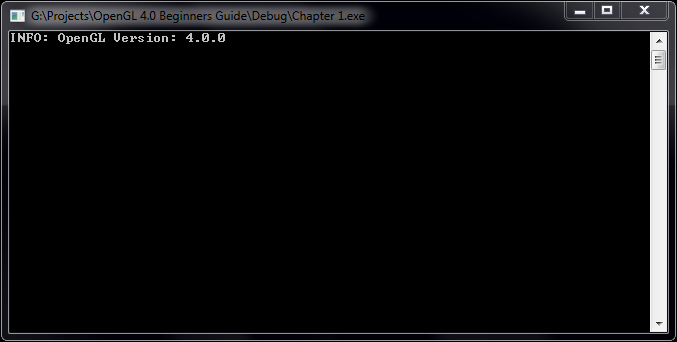
If the command line does not display OpenGL 4.0, something went wrong with your context creation or your driver did not honour your request for an OpenGL 4.0 context. We'll use the command line throughout the book to display debug and general information like this.
Screen Clear Color
The last function that we'll call in the Initialize function is
glClearColor with its four parameters set to 0.0f, representing (in order)
the Red, Green, Blue, and Alpha color channels, this corresponds to the
FreeGLUT flag GLUT_RGBA that we used with the glutInitDisplayMode function.
The values provided to glClearColor must be on a scale from 0.0f to 1.0f,
corresponding to 0% - 100% color channel intensity.
The RGB color mode is the primary method used in displaying colors on many electronic systems, and also in OpenGL. This system is very easy to use as it closely resembles the way our eyes interpret light due to its additive properties. What this means is that when two colour channels are mixed together, another color is created, for example: when you overlap two equally bright red and blue lights, the resulting light color is purple. This concept is entirely the same for RGB colors, thus modification is very intuitive:

In the RGB color space, when all of the color channels are at 100% intensity, the resulting color is white. This also means that the opposite is true: when all of the color channels are at 0% intensity, the resulting color is black.
The glClearColor function is used to define the color with which to clear the
back buffer each time a frame is prepared to be drawn to the screen. In our
case, the color is defined as black but can easily be modified to display any
color imaginable, for example:
glClearColor(1.0f, 0.0f, 0.0f, 0.0f);for redglClearColor(0.0f, 1.0f, 0.0f, 0.0f);for greenglClearColor(0.0f, 0.0f, 1.0f, 0.0f);for blueglClearColor(1.0f, 0.0f, 1.0f, 0.0f);for purpleglClearColor(0.0f, 0.0f, 0.5f, 0.0f);for dark blue
The last value, the alpha channel, determines the amount of transparency, but
since we don't use transparency in this chapter, setting this value is
meaningless for the moment.
Main Loop
At this point, we're done initializing and the Initialize function returns to
the main function where the program will call glutMainLoop, the heart of
the application. This function will run as long as the window is active and the
window hasn't been closed, issuing draw commands and handling window
operations. When the window closes, glutMainLoop terminates, and the main
function returns the standard return value of EXIT_SUCCESS.
Resizing
There are two functions left that haven't been discussed in the previous
section, the first of which is called ResizeFunction, which handles the
window resize event. Each time the window is resized a new window size is
defined and passed to the application. We capture these new values in
ResizeFunction and store the values in CurrentWidth and CurrentHeight.
While this is all quite straightforward, the function call that stands out the
most is glViewport, something we haven't seen up to this point. A viewport
defines the area drawn to by OpenGL; any point that falls outside of the
viewport is not drawn. The reason this is called a viewport is because it is a
window into the scene, looking over only a small area of a possibly much larger
scene.
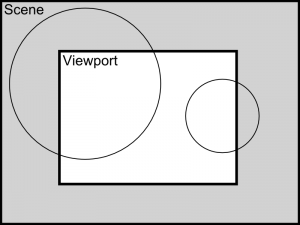
It is important to notify OpenGL about any changes in the viewport so that we don't draw any pixels outside of the screen, resulting in wasted calculations that would be better spent elsewhere.
The glViewport function takes four parameters, namely:
- X-coordinate
- Y-coordinate
- Width
- Height
The X and Y coordinates correspond to the left lower bottom corner of the viewport, in our case the left lower bottom corner of our window (0, 0). This function also allows you to draw to a very specific area on the containing window, smaller than the actual window itself. For example, this could prove useful if you need to incorporate OpenGL graphics into a user interface.
Rendering
The final function we'll discuss in this section is RenderFunction, where the
drawing (rendering) of objects and the swapping of the back and front buffers
occur.
The first function call that we encounter in RenderFunction is glClear, an
OpenGL function call which cleans certain buffers specified through its
parameters. What this means is that before we reuse the buffer, all of the
pixels in it are set to a certain value. For example, the back buffer is
cleared with the RGB colour value specified through glClearColor earlier in
the Initialize function. The back buffer is cleared by passing
GL_COLOR_BUFFER_BIT to glClear.
Besides the back buffer, we also clear the depth buffer by passing the
GL_DEPTH_BUFFER_BIT flag into glClear.
After clearing the buffers, we're free to draw whatever we like onto the
screen. However, in this example we don't actually draw anything but an empty
screen. This will change in subsequent chapters where we will actually start
drawing objects, and all of this drawing will happen after the glClearColor
line in RenderFunction.
Throughout the text you will encounter the words "drawing" and "rendering," in our case they both mean the same thing: displaying something onto the screen.
The next function that we encounter is glutSwapBuffers, which flips the front
and back buffers. At this line, your changes will be displayed to the screen
and any new drawing will occur on what was previously the front buffer.
In the following image, buffer B is used as the front buffer for displaying purposes, and buffer A is used as the back buffer for drawing purposes:
After the call to glutSwapBuffers, the buffers are swapped and buffer B is
now the front buffer and buffer A is now the back buffer:
Adding GLEW
Now that we have an OpenGL 4.0 context, we'll need the tools to work with it, and by that I mean the OpenGL 4.0 function calls that most likely don't come standard with your system.
To get support for these OpenGL 4.0 functions, our program will need some help
from the GLEW library. To achieve this, the only thing we need to do is to
update the Initialize function to look like the code below:
Step-By-Step
With only a single function call, we have access to all of the functionality that OpenGL 4.0 provides.
We already had the pre-processor include directive #include <GL/glew.h> to get
access to all of GLEW’s function calls. If you browse through the glew.h
file, you may notice that it replaces the normally used gl.h file. This is
why we won't explicitly use the gl.h file provided by your compiler until a
future chapter where we will set up a rendering context from scratch.
Next, we initialize GLEW in the Initialize function. If you look at the order
in which the functions are executed, you'll notice that the OpenGL context is
created in InitWindow before GLEW is initialized with a call to glewInit.
This happens because GLEW needs to probe the OpenGL implementation for the
function calls that it includes, which means that an active context is
required.
After the call to glewInit, we compare if the return value from glewInit
equals GLEW_OK, if it does not, we write an error message to the command line
and exit the program. The error message will contain the actual error returned
by GLEW through the glewGetErrorString function call.
Visually, your program hasn't changed, so when you run it, the screen should look exactly the same as the resulting screen from the previous section.
Measuring Performance
An important factor in most 3D computer graphics is performance and measuring how well your program performs. By performance we mean the amount of data that your program can process during a certain amount of time.
Performance in real-time 3D graphics is commonly measured with the amount of renderings a program can complete in the duration of one second; this measurement is called FPS (Frames per Second). In this section, we'll add a simple FPS counter to our program.
The first modification needed is an extra global variable named FrameCount:
Add the function declarations for TimerFunction and IdleFunction to our
function declaration section:
In the InitWindow function definition, modify the last few lines to include
calls to glutIdleFunc and glutTimerFunc:
Add the following line to RenderFunction as the very first line before the
call to the glClear function:
Add the following function definitions below the RenderFunction definition:
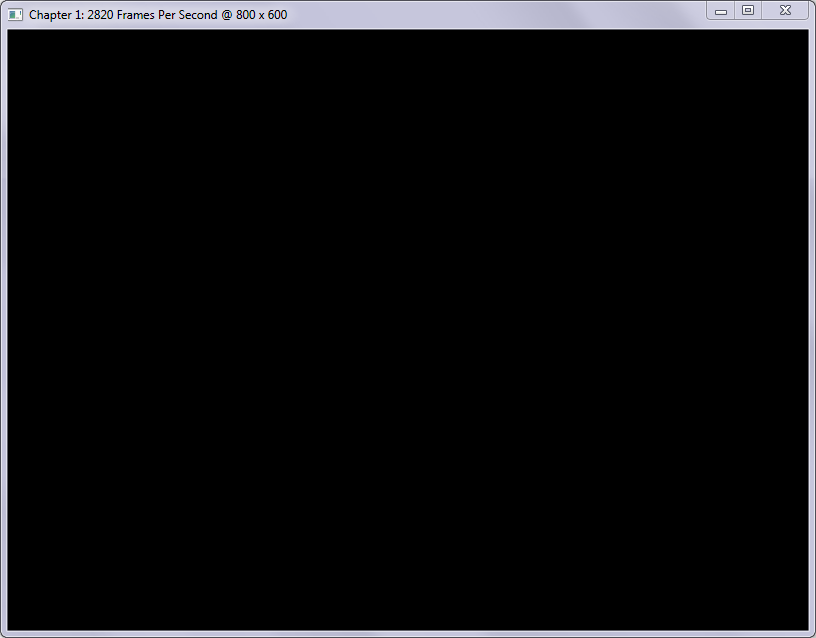
When you run your program, it should now look like the image below:
Step-By-Step
The first change that we made was adding a new global variable called
FrameCount. This variable will hold the count of the amount of frames that we
will render in a certain amount of time. The value contained in FrameCount is
incremented each time the RenderFunction function is called.
Next, we declared two new functions, IdleFunction and TimerFunction, which
we notified to FreeGLUT to have a certain meaning in InitWindow.
The IdleFunction function definition is only a single line which causes
FreeGLUT to redraw as soon as possible. IdleFunction is only run when the
program has no more work to do, a state we wish to avoid if our goal is
performance.
Frames per Second Timer
The TimerFunction function is a bit more involved, but not very hard to
comprehend. The last line we added to the InitWindow function caused a timed
function to be registered through a call to glutTimerFunc, which takes the
following three parameters:
- The amount of milliseconds that should pass before the function is called
- The function to call when the amount of milliseconds have passed
- The value to pass to the function
The first time that glutTimerFunc is called, the amount of milliseconds is
set to zero, causing the function to be called immediately, in our case this
function is TimerFunction.
The first line in TimerFunction checks if the value is not equal to zero, if
the value would be zero, we'd know that this would be the first time the
function is run and to skip the following block of code. In this case, the code
would simply reset the value of FrameCount and register another call to
TimerFunction in 250 milliseconds -- a quarter of a second.
When TimerFunction is executed again, the check encounters the number one,
signifying that this is not the first time that the function is executed and
that we are ready to display the frame count. The frame count will be displayed
in the title bar of the window, together with the current window's dimensions
in the following format:
Chapter 1: n Frames Per Second @ Width x Height
The title of the window is changed by passing a simple character string to the
glutSetWindowTitle function. The frames per second are calculated by
multiplying the value contained in FrameCount by four since we execute this
function every ¼ of a second. The width and height are obtained by
reading the value from the CurrentWidth and CurrentHeight global variables.
If you wish to update the title more often, you can set the glutTimerFunction
in the TimerFunction function to update more often. For instance, if you wish
to update the title eight times per second instead, change the millisecond
value to 125 and multiply the FrameCount by eight instead of four.
Vertical Sync
If you run your program and notice that the frames per second displayed don't change, your program may automatically be bound to Vertical Sync (or V-Sync). This value should be equal to the refresh rate of your monitor and is a feature added by your display driver. Vertical Sync is another method for eliminating flickering by waiting for the screen to finish drawing the current frame to the screen before submitting the next one.
As mentioned, sometimes your driver will turn on V-Sync by default for some programs. This incurs no difference in quality to the output of your program since the frames processed per second is pegged to the maximum amount of frames that your display device can process. This means that if your monitor runs at 60 Hz (refreshes the picture 60 times per second), a framerate of 100 frames per second means that 40 frames are never displayed and is therefore meaningless.
If you so desire, you can turn Vertical Sync off in your display driver’s control panel under the 3D Settings (or similar) heading to get a reading of the potential frames per second processed by your program. However, I do not recommend doing this since it will not enhance the performance of your program in any way whatsoever.
Frames per Second, more commonly referred to as FPS is the amount of frames that were rendered by a program during the timespan of a second. This is a metric with limited use in determining the rendering frequency of a program. There is, however, another metric that may provide more useful in a production software where performance is critical, and this is milliseconds per frame. OpenGL provides functionality to retrieve the time it took for the hardware to render a frame through performance queries, which you can read about here.
Conclusion
If you don't understand each function call yet, don't worry since you don't have to memorize them all. As long as you have a decent understanding of the mechanics that operate the program, you should be okay until we get to the nitty-gritty stuff.
Now that we have a valid rendering context and our window is good to go, in the next chapter we'll start drawing some actual geometry to the screen and explore vertices and polygons.
You can find the source code for the samples in this chapter here.

